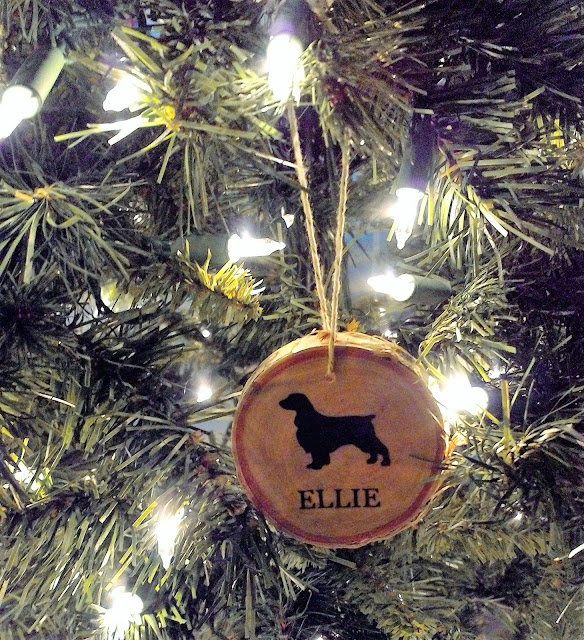
I'm taking a break from preparing for Tiny Expo today to share a new DIY with you for the holiday season! A couple of weeks ago, my husband decided that the birch tree near the front of our house needed some trimming. He cut a few small limbs off of the tree and offered them to me to see if I could make anything out of them. I will never let free crafting material go to waste, so with his help and some help from Pinterest, I dreamed up a fun personalized birch wood slice ornament for our tree.
Today I am giving a short tutorial on how to make a customized birch wood slice ornament. You can choose to personalize it or leave it as a rustic, wood ornament for your holiday decorations.
Materials
- birch wood branch
- miter saw
- modge podge
- sponge brush
- drill with small bit
- twine
- (optional) adhesive vinyl and transfer paper
- (optional) Silhouette Cameo
- scissors
Note: Please find help if you are not trained on how to use a miter saw and/or drill. Please use the proper safety equipment when using these tools.
Instructions
- Once you have the birch branches removed from the tree, you will need to slice them vertically using the miter saw. I sliced mine about .75" to 1" inch thickness.
- After you have the birch wood rounds, you will then use your drill with a smaller bit to drill a hole at the top of the round in order to thread the twine through to hang the round like an ornament. Once the hole is formed, cut some twine with scissors and knot it so that you form a loop to hang the round.
- The next step is to personalize the birch wood slice. I made one using the silhouette of an English Spring Spaniel along with the letters of my dog's name under the silhouette in black vinyl. I used my Silhouette Cameo to cut out the vinyl as well as the transfer paper to transfer the vinyl decal onto the round. I have found that vinyl does not adhere well to raw wood. You may opt to put a coat of modge podge on the wood first and let it dry before adhering the vinyl. If you don't have a Cameo, you could also use the freezer paper method to make a stencil by hand with a pencil and X-acto knife. You can iron the freezer paper onto the wood and use acrylic paint to paint on the custom design.
- After the birch wood slice has been designed, paint a thin coat of modge podge over the design using the sponge brush and let it dry for an hour or so to secure the design on the wood.
That's it! This was a quick afternoon project that made use of some natural elements as interior decor for my Christmas tree. Along with the English Spring Spaniel wood slice ornament, I made personalized ornaments for each of our nieces and nephews which will double as tags on their gifts this year.
There are several different ways birch wood slices can be used in home decor and crafting. Instead of just drilling one hole in the round, a second hole can be drilled into the round in order to thread the slices onto a long string of twine for garland that would look great wrapped around a Christmas tree or hanging on a mantel.
I hope you are having a great start to your weekend! I am looking forward to seeing a few local folks at Tiny Expo next Saturday in Ann Arbor.
Erica


No comments:
Post a Comment