Lina and Vi: November 2015

Saturday, November 28, 2015

New Zipper Pouches and Thanksgiving Wrap Up


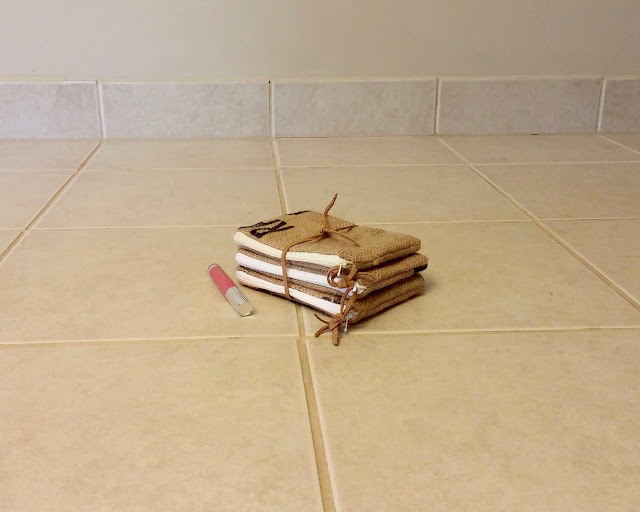
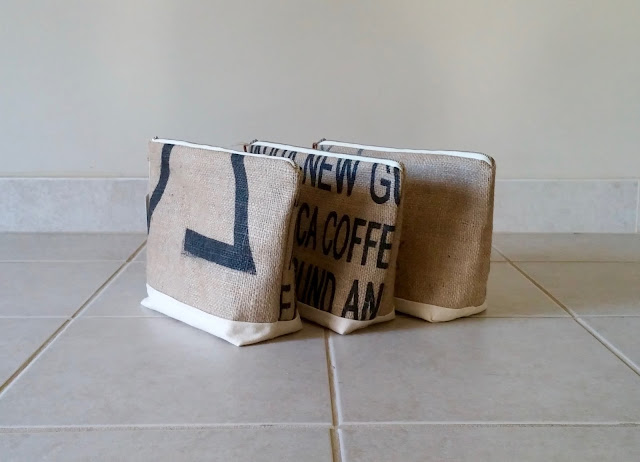
Burlap zipper pouches - handmade - Lina and Vi

Hi friends! I hope all of my stateside readers had a great Thanksgiving holiday on Thursday. We spent the day relaxing and visiting with my family. We ate fantastic food, drank wine, chatted, and enjoyed watching all of the nieces and nephews run and play together. The best days are the ones that are the most relaxed and casual, and that was one of those days.

Now that the holiday is over, everyone is on Christmas mode around here (and by everyone, I mean just me). We've put up our Christmas decor, and I even had Christmas music playing in the kitchen much to my husband's dismay :-). I've since toned it down a bit but now that the shopping season has officially started, I need to seriously start making a game plan for gifts...and cookies...and outfits...and you name it. I feel like the to do list multiplies in December, but at least it is only temporary!

With this long holiday weekend, I was fortunate enough to have a few hours to sew up a few new zipper pouches which are now listed in our Etsy shop. The burlap pouch gift sets are great stocking stuffers or teacher gifts, especially for someone who is looking for something handmade and eco-friendly but with tons of personality.

Burlap zipper pouches - handmade - Lina and Vi

Burlap zipper pouches - handmade - Lina and Vi

We also have single pouches available or even sets of two. All of the pouches have a one of kind cut of burlap on the outside paired with a hand-selected solid or printed fabric on the inside. They are secured with white, beige, and ivory YKK zippers along with a faux suede pull. They measure about 4 inches by 6 inches and can be stuffed with anything from nail polish to lip gloss or gift cards or sweet handwritten note.

Find these handmade burlap zipper pouches and more Christmas gift ideas in the Lina and Vi Etsy shop now. Remember to shop small and shop local today and everyday!

Erica

Sunday, November 22, 2015

Maltese Cross Repurposed Burlap Pillow


This week has been all about the pillows. I recently finished a custom order of three burlap pillows, one of which was a completely new and custom design which used the silhouette of a Maltese cross. She was looking for something original that would celebrate her heritage will also adding a cool conversation piece to her redecorated bedroom. I confirmed the shape with her and went to work creating a new stencil and then painting and sewing the pillow up this past week.

She was so happy with the end result, that she posted a photo I took of the Maltese cross pillow to a Facebook group she participates in with with the local Maltese community here in metro Detroit.  Unexpectedly, I received a flood of requests and orders late this week for this new design, and I can't be more thrilled about it.  These new customers are so excited, and I am so happy that I can create something that they will love!

It's back to the sewing as I have a few orders waiting in the queue. If you're interested in finding out more information on the Maltese cross pillows, visit our Etsy shop here. I hope you have a great week!

As always, thanks for stopping by,
Erica


Monday, November 16, 2015

Make It: Kitchen Rod Valence


I'm excited to share a new post for our Make It series today! I can't believe that the last post featuring the DIY burlap monogram flag was already back in July. Where is the time going?

Some of you may know that my husband and I are doing a bit of sprucing up in our kitchen right now. My husband is a woodworker hobbyist, and he just wrapped up making a new dining table for us. As part of that new item, I was feeling motivated to update some of the other decor related items in the kitchen, including the valence that hangs above our kitchen sink. The existing valence was the same black and yellow plaid Waverly print that was used throughout the house before I came along. This was the last one hanging, and I knew that I wanted to update the fabric to something not so dark. 

I'm here to share my DIY on making a new kitchen valence to fit a 3 inch flat rod. One of the difficulties in purchasing window treatments in our house is trying to find curtains that can fit this wide of a rod. As a result, this isn't the first time I sewed a valence for our home. A little over a year ago, I shared this valence that I created for our smaller bathroom using two contrasting fabrics. It still is in great shape today!

I would describe the skill level on this project as intermediate but I do feel that someone who has had some experience sewing and is looking to further learn would find this project fairly easy to work through. This is a rewarding project as the final product is visible every time you walk into your room!

Supplies:


One long strip of fabric of your choosing
One narrower strip of scrap fabric for the rod hole
Scissors
Pins
Sewing Gauge, Yardstick, or Measuring Tape
Tailor's chalk
Iron
Coordinating thread

Instructions:

1. Begin by cutting the main fabric to the desired length. Again, this will depend upon how wide your window is and how long you want the valence to drape down the top of the window. Leave at least a half inch seam allowance on all sides.

2. Next cut the scrap fabric to the same length as your main fabric. The width of the fabric should be 6 inches. This will leave enough give for a 3 inch rod to be inserted.


3. Hem the two short sides of the main fabric piece as shown above. I used varying seam allowance in my case as I just wanted to conceal the manufacturing information on the selvedge. Your hem can be as thick or thin as desired.


4. Next, hem one long side of the main fabric piece. I used a half inch seam allowance for the bottom as I was running low on the striped fabric. Use the gauge as a guide like I have done in the photo above and pin as you go to secure a straight hem.  Iron flat to crease the fold. Only hem one side – not both. We'll get to the other side in a moment.


5. Once the hem is set, we will start making the rod pocket. On the right side of the large fabric piece, pin the smaller scrap fabric strip to the top un-hemmed long edge like I have done above. The main fabric piece should have its right side facing you. Match the raw edges and pin them together. Sew along the edge to secure the two fabrics.


6. Here's the key step to finishing the second long side of the valence! Flip the scrap fabric piece up and behind the main fabric. You should have the right side of the main fabric facing you and the scrap fabric completely hidden under the main fabric. Top stitch just below the fold along the long side of the main fabric piece to secure the scrap fabric to the back of the valence. The photo above shows the back view of the valence at this point.


7. Now flip the main fabric piece right side down so that you are looking at the scrap fabric. Using a yard stick (or your rod as I have done above), measure 2 inches from the top of the valence or smaller/larger, depending how much of the valence you want above the rod. Draw a straight line the length of the valence on the scrap fabric using the tailor's chalk. Pin to secure the layers together.

8. Now measure 5 and a half inches from the top of the valence and draw a line using the chalk.  Pin to secure the layers. This will create the 3 inch pocket to slide the rod through with an extra half inch for give. Sew a straight stitch on both lines now drawn on the scrap fabric.


9. Iron to remove any creases. Trim threads. Slowly and carefully thread the window rod into the pocket valence.

I was able to use some leftover fabric I had purchased for a custom order of our burlap flatware holders. I wish I had more fabric because now I want to sew a few placements for the new table using the same fabric. Unfortunately, it doesn't measure out correctly but I'm hoping to find something that will match this striped fabric. With a new rug and some shelf organizing, our same old kitchen will have a bit of a facelift while still displaying our love of DIY in our home.

The best gifts are always handmade. I love how this brightens our kitchen and I hope you find this tutorial useful when considering sewing something similar for your home.

Enjoy!

Erica


Sunday, November 15, 2015

Brand New Burlap Zipper Pouch Sets

Lina and Vi burlap zipper pouch - www.etsy.com/shop/linaandviFriends! I'm happy to be back to share a few photos of the latest burlap zipper pouches I just wrapped up. I had several pouch set orders this past week, so I shifted gears and starting sewing a few new pouches to restock.  These new pouches are now available for purchase in our Etsy shop for all of the early Christmas shoppers out there.

Second only to our Michigan burlap pillow, these small 4" by 6" burlap zipper pouches are our best selling item. They are large enough to hold everything a typical wallet holds plus a cell phone and keys. I've had customers tell me they are using them for organizing their purses, as purse replacements, and to hold items while walking their dog (as a new dog owner, I can understand the complexities of balancing the leash, umbrella, keys, and poop bags all at once).

Each pouch is $8 individually or $21 for a set of three. I also take custom orders for those looking for specific fabric linings or sizes. Contact me at linaandvi at gmail dot com.

Lina and Vi burlap zipper pouch - www.etsy.com/shop/linaandvi

Lina and Vi burlap zipper pouch - www.etsy.com/shop/linaandvi

Lina and Vi burlap zipper pouch - www.etsy.com/shop/linaandvi

Lina and Vi burlap zipper pouch - www.etsy.com/shop/linaandvi


I hope you're enjoying the rest of your weekend! I'm hoping to do a bit of sewing later today in between taking a few hours to volunteer at a local kitchen in Ann Arbor.

Enjoy!
Erica

Saturday, November 7, 2015

Restocked! Colorful Burlap Zipper Bags


Burlap makeup bag - lina and vi - plymouth MI

Happy weekend! I jump started my weekend by spending a few hours Friday evening sewing up a bunch of new cosmetic burlap zipper bags for our Etsy shop.  These are all channeling the "business on the outside, party on the inside" mentality, as you see that I designed each of them with lining that provides a pop of color against the burlap.

These all measure approximately 11.5 inches by 8 inches and 3 inches deep. They turned out beautifully, and I want to keep one for myself as my own cosmetic bag (a free with purchase special back from about 2005) is literally ripping apart on the inside. But alas, I made these beauties to share with others this time around.

Shop now by clicking here. Enjoy!

Burlap makeup bag - lina and vi - plymouth MI

Burlap makeup bag - lina and vi - plymouth MI

Burlap makeup bag - lina and vi - plymouth MI

Burlap makeup bag - lina and vi - plymouth MI


Burlap makeup bag - lina and vi - plymouth MI


Monday, November 2, 2015

Large Burlap Cosmetics Bag

burlap zipper pouch - linaandvi - jute bag - etsy

Hi friends and happy Monday! I hope that all my U.S. readers had a fun and safe Halloween! Halloween is one of those holidays where being crafty and creative is celebrated and encouraged. It was awesome to see the kids in the neighborhood and work colleagues dressed up in different costumes, along with all of the photos shared across social media. I didn't end up dressing up (aside from a headband that sported a plush witch's hat), but maybe one of these years, I'll use these sewing skills to create something awesome to dress up and pass out candy.

So I had planned to share a few photos of what I was able to sew over the weekend, but then Etsy beat me to the punch.  I can't believe it, but this new makeup burlap zipper pouch has already sold! It had been listed for less than 12 hours, so it is our best selling item to date.

This is the first time I've created a large zipper pouch. I have been thinking about sewing one for myself for quite some time, and I decided to design one yesterday with some of this fun and colorful printed cotton fabric as in the lining.  The bottom of the bag is a cream canvas cotton fabric. The burlap pouch zips with a vanilla colored, metal-tooth YKK zipper.  The entire bag measures 11.5 inches by 8 inches.

burlap zipper pouch - linaandvi - jute bag - etsy

burlap zipper pouch - linaandvi - jute bag - etsy


It is honestly one of my most favorite items to date. I feel like I say that a lot, but I really do love this bag and I'm so happy someone else did too.  Now, it's heads down (...or needle down?) over here as I design a few more of these large zipper pouches for the upcoming holiday shopping season and craft shows! Keep visiting our Etsy shop for new updates and new items coming soon.

Enjoy!
Erica